
Bath panels present your bath with an attractive external appearance, helping it blend with the rest of your bathroom décor.
The main purpose of bath panels is to cover all the plumbing lines and unsightly installation elements that come with most baths.
Bath panels also create a clean-cut finish, enhancing the overall look of your bathroom.
Do I Need a Bath Panel for Installing a Bath?
Depending on the position of your bath, you may need just one bath panel. However, you may need two or three panels if you have more exposed sides.
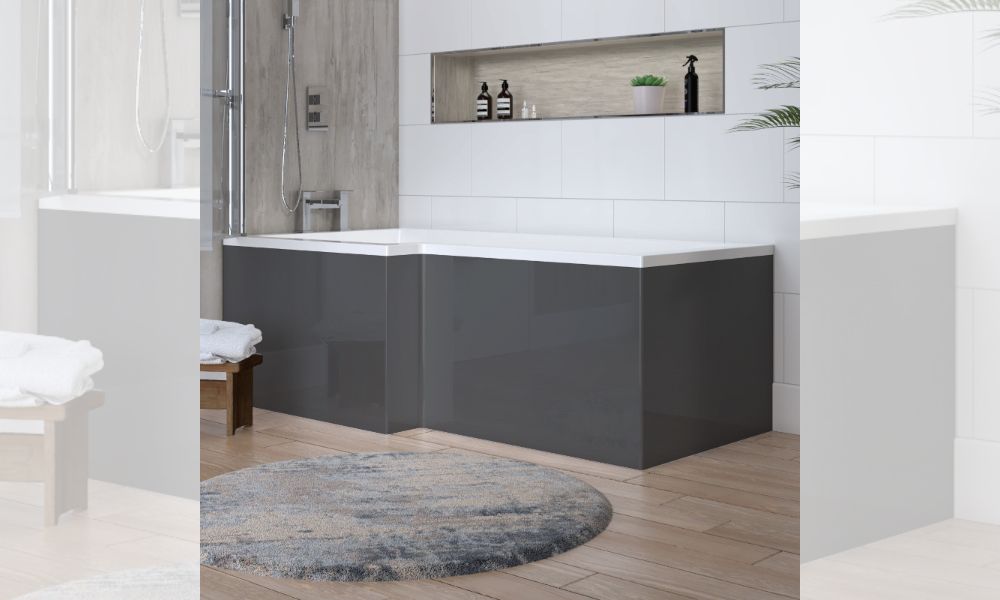
The different types of baths that do need panels include shower baths (L-shaped and P-shaped), corner baths, and Whirlpool Jacuzzi baths.
Freestanding baths (slipper baths and roll-top baths) don’t need bath panels, as they have a natural curved finish.
If you’re not sure whether your bath needs panels, please contact our friendly team now to confirm.
This short blog post covers the different types of bath panels and the various details you need to consider when picking the right one for your bathroom.
- Understanding Bath Panel Sizes
- How to Measure a Bath Panel?
- Different Types of Bath Panels
- How to Fit a Bath Panel
- How Much Do Bath Panels Cost?
- How Much Time Should You Allocate for Installing Bath Panels?
- Should You Install a Bath Panel Yourself (DIY) or Get a Bath Panel Fitter?
Navigate to any section of this post by clicking on the links above.
Understanding Bath Panel Sizes
Different-sized baths require different-sized bath panels. Bathroom City stocks a range of standard sizes that include:
Front panels: 1100 / 1200 / 1400 / 1500 / 1600 / 1700 / 1800 / 1900mm (length) x 540mm (height)
End panels: 700 / 750 / 800 / 900mm (length) x 540mm (height)
Bath panel dimensions vary by manufacturer/brand, and hence, they are also available in various other sizes. In addition, they can be cut to any custom size and sealed to suit even non-standard bath sizes.
Since bath panels are a form of side covering for your bath, it’s important to choose the right size to achieve a seamless look from the floor to the top surface of the bath.
How to Measure a Bath Panel?
The best way to get correct bath panel measurements is to measure your bath accurately.
You have to be extra careful when measuring the height. The height of the bath tends to vary, as most baths are equipped with a height-adjustment feature for easy alignment with existing water pipes.
Note down the readings and double check to confirm. With such a vast variety available in bath panel sizes, it should be easy to find bath panels that are closest to your measurements.
Different Types of Bath Panels
Side bath panels and end bath panels are the two different types of bath panels.
A side bath panel, also labelled front panel, covers the length of your bath. An end bath panel covers the width of your bath.
A bath panel can add the perfect finishing touch to your bathroom. Depending on the colour you choose – dove grey, platinum grey, pearl grey, white, indigo, gold, and more – you can transform the theme of your bathroom.
The Different Bath Panel Colours and Finishes Available
You can choose from an assortment of colours and finishes to match the rest of your bathroom aesthetic.
For instance, white bath panels present a clean, contemporary look. Pearl grey, anthracite grey, platinum grey, or dove grey can match the other furniture in your bathroom.
Other colour options include gold, indigo blue, dark olive, matt white, and more.
The different bath panel finishes include acrylic high gloss, acrylic luxury, protective acrylic laminate, water-resistant acrylic laminate, and classic variable hand-painted.
Commonly Used Bath Panel Materials
1. MDF (Medium-Density Fibreboard)
The MDF material is the first choice for bath panels, as it is versatile, moisture-resistant, and affordable. The thickness of MDF boards varies between 6mm and 18mm.
An acrylic laminate finish over core MDF is a new feature that provides added strength to the bath panel, making it bend-resistant. This finish also provides your bathroom with a warm visual appeal.
Sprayed MDF means the material has been spray painted.
2. Acrylic
Acrylic is the most widely used material in the manufacture of modern baths.
While bath panels made of thinner gauge acrylic are flimsy and can bend easily, panels made of thicker gauge are sturdy and durable. Acrylic panels can also be easily cut to size.
3. Wood
The advantage of natural wood is it adds a touch of warmth around your bath area.
A coat of water-resistant wood paint in a colour of your choice will not only ensure the panels are durable but also enhance the look of your bathroom.
How to Fit a Bath Panel
Fitting a bath panel is the last step in bath installation. Read the manufacturer’s instructions carefully before you start the installation process.
The Basic Tools You’ll Need for Bath Panel Installation
- Tape measure
- Pencil
- Scale
- Gloves
- Spirit level
- Hacksaw
- Fine grit sandpaper
- Screwdriver
- Electric drill
- Wooden frame (wooden batten)
- Wood screws
A Short Breakdown of the Installation Process
1. Measure Your Bath Accurately
Measure the distance from the rim of the bath to the floor. This reading will be the height of your bath panel. Next, measure the length of the bath.
Note down the readings, ensuring your measurements are accurate to the last millimetre.
Test the fit by holding up the new bath panels (side and end panels) against the bath and check if they are the correct size. (It’s alright if the bath panels are slightly larger.
They shouldn’t be smaller, though.)
2. Trim the Bath Panels
If the new bath panels aren’t a perfect fit, mark the points on the panels with the pencil and draw straight lines.
Using the hacksaw, cut the bath panels carefully along the lines you marked to match your measurements. Smooth over the edges using fine grit sandpaper.
3. Mark the Exact Position of the Bath Panels
Now that the bath panels have been cut to the precise size, you can try reattaching them to your bath. Ensure the panels are in perfect alignment, using a spirit level.
Mark the position of the panels on the floor and wall. You can align the wooden frame on these points in the next step.
4. Screw the Wooden Frame to the Floor and Wall
Align the wooden frame with the markings on the floor and wall, and screw it to the floor and wall.
5. Slot the New Bath Panel into Place
Slot the bath panels into place against the attached frame.
If the bath panels don’t have pre-drilled holes, drill new holes using the electric drill. Drill matching holes on the frame and secure the panel to the frame using wood screws.
How Much Do Bath Panels Cost?
The cost range of bath panels is vast – starting from £33 for cost-effective options to £240 for premium ones.
The major factor affecting the cost of bath panels is the material quality. Acrylic bath panels are much cheaper than MDF and wood bath panels.
The other factors that affect the cost of bath panels include size, colour, brand, length of guarantee, and finish.
How Much Time Should You Allocate for Installing Bath Panels?
With the right tools and accessories (as detailed above), the installation can be completed within 1 or 2 hours. However, if the design of the panels is unique or complex, it may take 3 to 4 hours.
In any case, you must allocate a few hours for installing new bath panels.
Should You Install a Bath Panel Yourself (DIY) or Get a Bath Panel Fitter?
Most often, installing a bath panel is a simple DIY task. You can complete it easily and quickly if you have basic DIY skills.
But if the installation seems to be difficult or you are not confident that you can do a perfect job, it’s best to hire a professional.
Shop Bath Panels
At Bathroom City, our wide variety of bath panels includes various colours, dimensions, and materials. Browse through our collection for the perfect bath panel for your bathroom.
Other related articles you might also like to read: