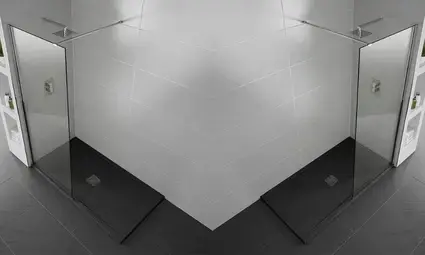
A shower tray is an integral element of your shower enclosure, providing a level and stable surface while showering. It also separates the wet and dry zones in your bathroom. Hence, you must choose a durable shower tray that will last many years.
Whether you want to replace a leaking tray or upgrade to a better-quality tray, it’s important that you learn how to fit a shower tray properly. An improperly fitted or low-quality tray will cost you more in terms of frequent leaks and repairs. Eventually, the tray will need replacement.
- Types of Shower Tray
- The Tools You’ll Need to Fit a Shower Tray
- How to Fit a Raised Shower Tray
- How to Fit a Low Profile Shower Tray
Navigate to any section of this post by clicking on the links above.
Types of Shower Tray
There are two types of shower trays: low profile shower trays and raised shower trays.
Low Profile Shower Trays
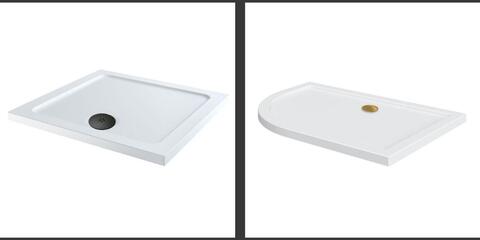
As the name suggests, the height of these shower trays is low – 2.5 to 4cm (25 to 40mm) –creating a low step into your showering area.
Low profile shower trays are designed for easy accessibility. You can also opt for an inbuilt anti-slip surface to eliminate the risk of an accidental fall. You’ll need additional depth/access to install the drain body beneath the tray.
The minimalist aesthetic of a low profile shower tray will suit any small bathroom. Also, the lower height of this tray reduces the hazard of accidental trips, providing additional safety for kids and elders.
Raised Shower Trays
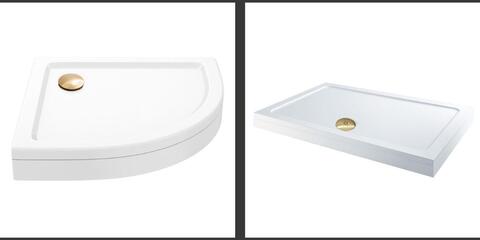
Again, as the name indicates, you can fit this shower tray onto any level floor surface. In addition, these trays are available in a choice of different designs.
For instance, you can use leg kits and side profiles to raise some trays further to the desired height. This feature is especially handy when easy access isn’t possible into the floor.
A raised shower tray, therefore, is the perfect choice when the drainage plumbing can’t be set into the bathroom floor. Since this tray is set at a higher level compared to a low profile shower tray, it is more suitable for a large bathroom.
Anti-slip coating is an optional feature, safeguarding users against inadvertent falls. Most shower enclosures are fitted with a raised shower tray.
Fitting a shower tray is a moderately difficult task. But this detailed step-by-step DIY article will teach you how to fit a shower tray without professional help.
The Tools You’ll Need to Fit a Shower Tray

Before fitting a shower tray, you need to familiarise yourself with the assembling guidelines provided by the manufacturer. Go through the instructions carefully.
Gathering the right tools first will simplify your work, as you’ll not need to visit the handyman’s shop when work is in progress.
The Main Tools Needed to Fit a Shower Tray:
- A pencil
- A screwdriver set
- An adjustable wrench
- A drill
- A spirit level
- A jug or kettle
- Kitchen roll
- Silicone sealant
- Sealant gun
- A hacksaw/jigsaw
Additional Materials Needed to Fit a Low Profile Shower Tray:
- Building sand
- Cement
- Mortar Trowel
How to Fit a Raised Shower Tray
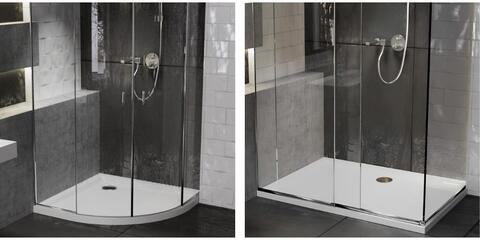
The kit of a raised shower tray is adjustable, consisting of a panel and a set of legs. You can adjust the legs to keep the tray in an elevated position.
The raised position of the tray makes it easy to access the waste. This is especially helpful when you place the shower tray on a concrete floor where it may not be possible to cut a hatch for the waste.
Follow the steps detailed here to fit a raised shower tray.
a. Mark Out the Position and Place the Tray
Using a pencil, mark the exact place where the shower tray will stand. Position the tray in the chosen spot and ensure there are no clearance issues.
b. Adjust the Height of the Riser Legs
Adjust the tray to the desired height by screwing the legs into position. You can adjust the four corner legs first and then adjust the centre leg once the tray is level. Tighten the lock nut of each leg.
Using a spirit level, make sure the shower tray is absolutely level, as a sloped tray not only looks awful but is also uncomfortable. To eliminate future issues, check the tray in all directions to ensure it is level.
Also, make certain there’s enough clearance beneath the tray to attach the shower waste. A gap of 50mm will suffice.
Check once more to see if the shower tray fits the marked spot.
c. Attach the Tray’s Waste
Check the location of the main drainage pipe. After establishing the best route, attach the outlet pipe of the tray’s waste to the main drain.
You will minimise a great deal of work if the position of the waste in the new shower tray is the same as that in the old tray.
Using an adjustable wrench, attach the waste outlet pipe to the main drain securely to prevent water leakage.
After you attach the tray’s waste, make sure all the drain pipes align properly.
d. Attach the Side Panels
Attaching the side panels to create a neat finish is relatively simple, as these panels are easy to attach.
You only need to follow the manufacturer’s instructions closely. The instructions will vary based on the material type, shape, and size of the panels. Assemble the side panels taking care to follow the instructions.
The shower tray installation is now almost complete.
e. Test If Everything Is Watertight
In this step, you’ll identify whether there are any drips and leaks in the new connection.
Wrap kitchen roll around the joints of the new connection. Take some water in a jug or kettle and pour it down the waste. In case there’s any leak, remove the connections and start over again.
If the water flows without any blockage, it means everything is fine. Repeat this a few times to ensure everything is watertight.
f. Apply Sealant
In this final step, you create a waterproof seal that prevents water from leaking to the bathroom floor. It also gives the shower tray a nice finish.
After the side panels are assembled, use silicone sealant and a sealant gun to seal the edges. Also, seal the panel sides and joints between the tray and panels.
Silicone adhesives typically dry within 24 hours. But if the sealant layer you have applied is thick, it can take much longer to dry.
How to Fit a Low Profile Shower Tray
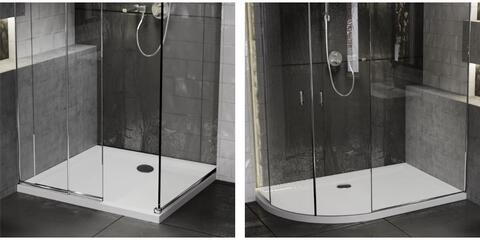
When fitting a low profile shower tray on a concrete floor, it’s best to use the existing waste.
The primary reason for this is you will minimise the amount of work. For one, digging up a concrete floor isn’t easy. In addition, repositioning a waste pipe can be a lot of work, as it’s difficult to “guess” where drain pipes are running under the floor.
Follow the steps detailed here to fit a low profile shower tray.
a. Ensure the Floor Beneath Is Firm
A low profile shower tray is quite heavy. Hence, a weak or flexible bathroom floor cannot support it.
While concrete floors are perfect, the same cannot be said about wood flooring. So check your bathroom floor carefully, especially if it has wood flooring. Since the floor beneath the shower tray needs to be firm, make sure it’s not damaged or wet and soggy.
Test the floor giving it your full weight. If the floorboards creak under your weight, you’ll need to replace them with thicker boards.
Make accurate measurements and mark with a pencil the position of the shower tray. Also, check if the floor is level with a spirit level.
Next, place the tray in the marked spot and ensure there are no clearance issues. (Note: Low profile shower trays of larger dimensions are difficult for one person to handle.)
b. Cut an Access Hatch
Mark with a pencil the easiest route between the main drainage pipe and the tray’s waste.
Next, cut an access hatch in the floorboards next to the tray using a jigsaw. Ensure the tray isn’t damaged by placing a dust sheet across it.
The hatch will allow you quick access to the drain pipe when the shower tray has been set.
c. Locate the Low Profile Shower Tray Waste
Evaluate the location of the shower tray waste and main drainage pipe. Next, cut a recess around these.
Use a pencil to mark the areas and cut the recess. Ensure the fit is comfortable and not very tight. Assemble the tray waste and set it in place.
d. Create and Lay Mortar
Create mortar by mixing cement with building sand in a ratio of 1:5 (one part of cement to five parts of building sand).
Then use a trowel to lay a thin, uniform layer of mortar across the spot. Use steady strokes to ensure there are no bumps.
e. Place the Low Profile Shower Tray
Place the shower tray on the mortar and press gently. Wiggle the tray a bit and tap it gently.
The wiggling and tapping will remove any air bubbles caught in the mix. Use a spirit level to check whether the tray is 100% level.
In case the tray is not level, it’s alright to lift it and reset it. Just ensure the shower tray is 100% level.
Once you are satisfied, leave the tray to dry for a minimum of 24 hours.
f. Connect the Outlet Pipe
Assemble the tray’s waste and connect it to the main drain (outlet pipe) through the access hatch you cut next to the tray.
Use an adjustable wrench to ensure the connection is secure. Keep the access hatch functional for future maintenance.
After you connect the outlet pipe, make sure all the pipes are in proper alignment.
g. Check If There Is Any Leak
Wrap kitchen roll around the joints and pipes of the new connection. Next, pour water from a jug or kettle on the tray.
If there’s a leak, the dry kitchen roll will become wet. You can then remove the connections and start over again.
But if the water flows through the waste without any blockage, it means everything is fine. Repeat this a few times to ensure there is no leak.
h. Finish with Sealant
In this final step, using silicone sealant and a sealant gun, seal around the edges of the shower tray. Cover the entire area around the edges with this adhesive so that water cannot get underneath when the shower is in use.
Allow the initial seals to stand for 24 hours.
Apply a secondary layer of sealant along the edges of the shower tray to ensure it is even more watertight.
Congratulations!
You have finished fitting a low profile shower tray.
Shop Shower Trays
At Bathroom City, you’ll find different shower trays – square, quadrant, rectangle, and black – in an assortment of shapes and sizes. Regardless of the dimensions of your shower enclosure, we are confident that you’ll find the right fit and shape that fulfils your needs.
You also have a wide choice of materials – acrylic, stone resin, ceramic, marble, and many more.
Additional articles you may enjoy reading: