- The Importance of Bathroom Cleaning
- How Often Should You Deep Clean the Bathroom?
- How to Deep Clean the Bathroom Floor Tiles?
- How to Deep Clean Bathroom Grout?
- How to Deep Clean the Bathtub?
- How to Deep Clean the Bathroom Sink?
- How to Deep Clean Bathroom Taps?
- How to Deep Clean Shower Enclosure Including the Shower Tiles/Tray?
- How to Deep Clean a Bathroom Mirror?
- How to Deep Clean a Bathroom Radiator?
- How to Deep Clean a Bathroom Exhaust Fan?
- How Much Does it Cost to Deep Clean a Bathroom?
Navigate to any section of this post by clicking on the links above.
Your bathroom is the most vulnerable place in your house, where dirt, stains, and bacteria can accumulate quickly. Hence, a regular weekly clean isn’t enough to keep your bathroom spick and span. You’ll need to undertake a deep clean at least once a month for your bathroom to regain its original splendour and elegance.
Before you start deep cleaning your bathroom, always follow these two precautionary measures: open the windows and wear safety hand gloves.
The Importance of Bathroom Cleaning
The main advantage of regular cleaning is it gives a more enjoyable and relaxing bathroom experience.
Moreover, an unhygienic bathroom can create a hazardous environment in which harmful germs breed. Unclean bathroom surfaces will quickly become a favourable environment in which disease-causing microbes, such as bacteria and viruses, can thrive for several days.
Over time, these microbes pose a grave health hazard that needs to be neutralised on a day-to-day basis. Evidently, the most effective way to eliminate the risk of infection and illness is to clean your bathroom regularly.
Your routine weekly cleaning tasks must include scrubbing the toilet, wiping the shower enclosure, swabbing the sink, and mopping the floor.
How Often Should You Deep Clean the Bathroom?
Your bathroom may appear clean on the surface.
But did you know that your toothbrush handle can have 50 times more germs than your toilet seat?
Bacteria and germ statistics reveal how unsanitary your bathroom can get. Since your bathroom is likely rife with harmful microbes, it’s best to take preventive measures to avoid these germs altogether.
You can stay well and safe without much effort. As long as you stay punctual in your weekly cleaning tasks, you can deep clean your bathroom once a month.
The need to rid your bathroom of lurking pathogens should give you the extra incentive to deep clean it at least once a month.
How to Deep Clean the Bathroom Floor Tiles?
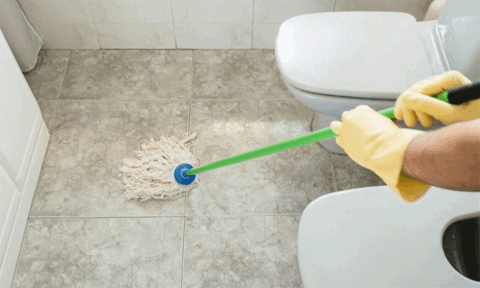
Not all bathroom floor tiles need the same treatment. You should be watchful about making a mistake because you can easily cause more damage than good. We will examine how to deep clean different types of bathroom floor tiles.
1. Marble, Granite and Other Natural Stone Floor Tiles
Most floor cleaners contain alkalines, acids, or other chemical ingredients that can damage the surface or gloss of marble, granite, and other natural stone floor tiles.
A freshly scented tile cleaning solution is safe for natural stone tiles because it does not damage surface treatments such as sealants or wax polish, or surfaces that have been crystallised. This floor cleaner has been specifically formulated to deep clean natural floor tiles. Follow the two steps below:
Step 1: Remove loose dirt by sweeping/vacuuming the floor thoroughly.
Step 2: Take half a bucket of water (approximately 10 litres) and mix the floor cleaner in dosage/dilution as per the manufacturer’s directions. Mop the bathroom floor with this solution. Take a separate bucket of plain water and rinse the floor mop regularly. (For a genuine deep clean, use a scrubber that gets into grout lines, recesses, and corners.)
Alternatively, you can use an automatic scrubber that, as good as, replaces the traditional mop and bucket. You can use this lightweight scrubber to apply the cleaning solution after mixing it with water in the recommended dosage/dilution. And in one pass, you can scrub and dry the bathroom floor as this cleaning solution is a low-foaming product.
Check the dirty water container of the scrubber when you empty it. If the water you discard is too dirty, do a second pass.
2. Ceramic and Porcelain Floor Tiles
Both ceramic and porcelain floor tiles are resilient and offer a hard-wearing finish for your bathroom floor. These tiles are stain-resistant and easy to maintain. However, you need to avoid using abrasives such as steel wool and scouring pads on ceramic and porcelain floor tiles, as the tile surface can get damaged. Also, avoid using chemical cleaners that contain ammonia, bleach, or acids.
Step 1: Remove loose dirt and dust by sweeping/vacuuming the floor thoroughly.
Step 2: Take 5 litres of water in a bucket and mix it with approximately 2 litres of vinegar. Saturate the tile surface with this water-and-vinegar mixture using a mop. (Alternatively, you can use a commercial cleaner and mix the floor cleaner in dosage/dilution as per the manufacturer’s directions. Also, you can use an automatic scrubber to save time.)
Step 3: Wait for a few minutes, but don’t allow the cleaner to dry.
Step 4: Use a soft-bristle brush to scrub the floor, focusing on stained areas. (If scrubbing the floor is not something you enjoy, use an electric floor scrubber.)
Step 5: Rinse the floor thoroughly with warm water.
Step 6: Wipe the floor dry with a microfiber cloth or clean towel.
3. Luxury Vinyl Floor
Luxury vinyl flooring is renowned for its low maintenance. Bicarbonate of soda is the number one choice for deep cleaning vinyl flooring. Avoid using scourers on vinyl floor tiles as the tile surface can get damaged permanently.
Step 1: Remove loose dirt and dust by sweeping/vacuuming the floor thoroughly.
Step 2: Take 1 litre of warm water in a bucket and mix it with one tablespoon of bicarbonate of soda. Alternatively, you can use a mild detergent. (Don’t soak or wet the floor. And don’t use a steam floor mop as the high heat can damage the vinyl flooring.)
Use a well wrung out soft mop to wipe the floor. (Alternatively, you can use luxury vinyl floor cleaner or any cleaning agent that is suitable for use on Luxury Vinyl Tile flooring and follow the manufacturer’s directions.)
Step 3: Using a damp cloth dipped in clean water, wipe the floor thoroughly.
Step 4: Wipe the floor dry with a clean, soft towel.
4. Engineered Wood Flooring
Engineered wood flooring is a modern kind of flooring that provides greater structural stability compared to solid wood flooring. This stylish and practical flooring enhances the aesthetics of your bathroom.
Another feature of this trend-proof flooring is it can last for decades unless there’s a fire or flood in your home. A commercial cleaning product specifically designed for deep cleaning engineered wood flooring is the ideal choice.
Step 1: Remove loose dirt and dust by sweeping/vacuuming the floor thoroughly.
Step 2: Use a sponge mop or rag mop to apply the cleaning solution you have chosen on the floor. Wet the mop with the cleaning liquid and wring it out. Mop the entire bathroom floor, focusing on stained areas.
Step 3: Use a different damp mop dipped in fresh water to wipe the floor. Repeat this step to ensure you have cleared the last traces of the cleaning solution off the floor.
Step 4: Remove any remaining moisture on the floor by wiping it dry with a clean, soft towel.
How to Deep Clean Bathroom Grout?
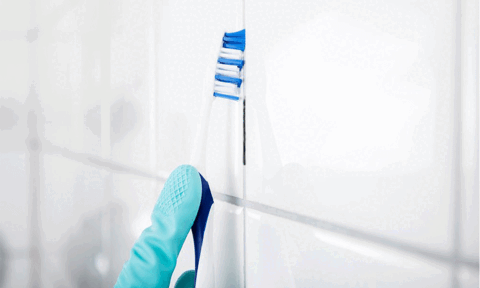
Grubby grout can bring down your bathroom instantaneously. And deep cleaning bathroom grout can be a nightmare, especially if the colour of the grout is light. But getting the grout to appear clean and hygienic again need not be a difficult task.
You can also stop the problem from recurring by carrying out this deep cleaning process once a month. Simply follow the steps detailed below.
Step 1: Mix bicarbonate of soda with water to make a thick paste. Use an old toothbrush to rub this mixture on to the dirty grout. You can really speed up this task by fitting an old head to your electric toothbrush. Make sure you work the homemade mixture well into the grout.
Step 2: Fill a spray bottle with equal measures of vinegar and water. (Vinegar is a safe and powerful cleaning solution that’s been used for ages.) Spray this mixture over the paste you applied on the grout.
The reaction for tackling grout is swift. Bubbles start forming on the thick mixture. Wait for 5–10 minutes.
Step 3: Scrub the grime gently using the toothbrush. Rinse well with water. Repeat this process until the grout is back to its original colour.
If the stain on the grout is stubborn, you can use a drill brush with stiff bristles or a deep clean brush for quick results. This special multi-purpose brush is very effective for cleaning even the most stubborn stains on grout.
Save yourself tons of time by using this 4-piece drill brush to turn a tough task into an easily manageable one. And the effort needed to clean the grout is a tiny fraction of what’s required when you scrub with a toothbrush.
Note: While vinegar does not damage ceramic tiles, it can stain marble and granite tiles quickly. Hence, avoid using vinegar on natural stone.
Can you use bleach to clean Bathroom Tile Grout?
We do not recommend the use of bleach on bathroom grout. While bleach is a powerful cleaner that can remove stains and kill bacteria, it can cause grout to deteriorate over time and may also release harmful fumes.
Instead, use a cleaner that is designated as safe for natural stone.
Best Practice: Grout is porous and vulnerable to bacterial growth. Hence, using a grout sealer once in a year will prevent grime from infiltrating it.
How to Deep Clean the Bathtub?
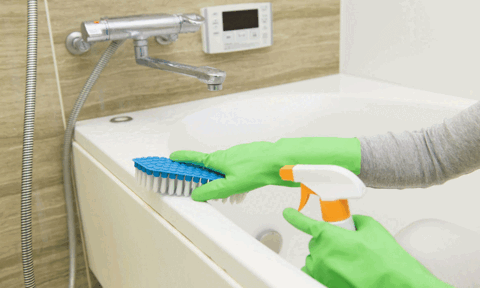
Like bathroom floor tiles, bathtubs are also made of different materials. And due to this reason, not all bathtubs need the same treatment. If you use the wrong cleaning solution, you could easily cause more damage than good. We will examine how to deep clean different types of bathtubs.
1. Acrylic and Fibreglass Bathtubs
Unlike other bathtubs, acrylic and fibreglass bathtubs are lightweight, durable and require minimal maintenance. You can deep clean both these bathtubs using simple cleaning solutions.
However, you should avoid using abrasive cleaners or scouring powders because abrasive cleaners will scuff or scratch the surface of these materials.
Step 1: Mix baking soda with warm water. Prepare a dilute solution.
Step 2: Apply this mixture gently on the bathtub with a non-abrasive applicator. A soft cloth, sponge, or brush made of polyethylene, nylon, or polyester can be used.
Step 3: Apply a thicker paste of this mixture on stubborn areas. Alternatively, you can make a paste by mixing vinegar and baking soda. You can apply this thick paste on stubborn areas.
Step 4: Wet the surface of the tub and gently rub with a soft cloth, sponge, or soft nylon brush.
Step 5: Rinse the cleaned surface thoroughly. Ensure no cleaning residue remains.
2. Cast Iron Bathtubs
Don’t let the name deceive you. Cast iron bathtubs are some of the finest bathtubs available today. They are meticulously designed and produced by handpicked craftsmen. But deep cleaning a cast iron bathtub demands care and caution.
Avoid using abrasive cleaners such as steel wool and scouring powders as these harsh products can damage the enamel on the surface. And don’t use acidic products and vinegar because they can also wear away the enamel.
Step 1: Choose the right enamel cleaner. Test on a small area of the bathtub first.
Step 2: Put a hazelnut-sized amount on a damp cloth or sponge and clean from one end to the other, leaving all accessories until last.
Step 3: Scrub at stubborn stains until they fade away.
Step 4: Rinse the bathtub with warm water thoroughly after you have finished cleaning.
3. Natural Stone Bathtubs
Natural stone bathtubs radiate beauty and luxury. While these artfully shaped bathtubs are elegant, deep cleaning them can be time-consuming because they’re usually carved from a single block of stone. Use a bathtub cleaner that does not contain harsh chemicals or scouring agents.
Step 1: Pour a few drops of a concentrated bathtub cleaner on a soft towel or sponge.
Step 2: Rub the cleaner over the surface of the bathtub using small circular motions. Clean the outer surface first. Begin at the front (head) end and move towards the back (legs) end. Repeat this process on the inner surface as well.
Ensure that the overlapping circles cover the entire surface of the bathtub.
Step 3: Rinse the surface completely with clean water. Repeat the previous step to ensure no trace of stains remains on the bathtub.
Step 4: Use a soft cloth to dry the surface of the bathtub after you finish.
How to Deep Clean the Bathroom Sink?
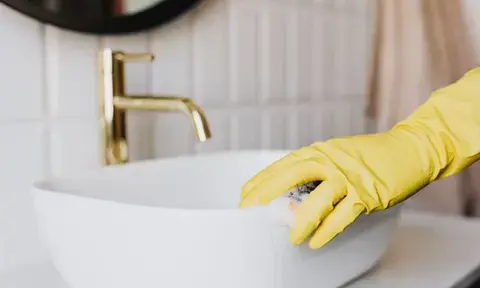
Not all bathroom sinks need the same treatment. For example, if you use a harsh cleaner on a natural stone sink, you will cause more damage than good.
Like bathroom floor tiles, bathroom sinks are also made of different materials. Ceramic is the most popular material used in the manufacture of bathroom sinks. Porcelain, fireclay, and vitreous china are different types of ceramics.
We will examine how to deep clean bathroom sinks made of different materials.
1. Ceramic and Porcelain Bathroom Sinks
Both ceramic and porcelain sinks are resilient and offer a durable finish. The main advantages of these sinks are they are stain-resistant and easy to maintain. However, avoid using abrasives such as steel wool and scouring pads, as the sink surface can get damaged. Also, avoid using harsh chemical cleaning agents that contain ammonia, bleach, or acids.
Step 1: Using a clean cotton towel, wipe the entire sink dry.
Step 2: Take 100 ml of water in a plastic cup and mix it with approximately 20 ml of vinegar. Saturate the sink surface with this water-and-vinegar mixture using a clean sponge. (Alternatively, you can use a commercial cleaner and how to use the cleaner as per the manufacturer’s directions.)
Step 3: Wait for a few minutes, but don’t allow the cleaner to dry.
Step 4: Use a non-scratch, soft-bristle brush to scrub the sink, focusing on stained areas. (If scrubbing the sink is not something you enjoy, use an electric sink scrubber.)
Step 5: Rinse the sink thoroughly with warm water.
Step 6: Wipe the sink dry with a microfiber cloth or clean towel.
2. Acrylic Bathroom Sinks
Unlike other sinks, acrylic and fiberglass sinks are lightweight, durable, and require minimal maintenance. You can deep clean both these sinks using a simple cleaning solution. However, avoid using abrasive cleaners or scouring powders because they will scuff or scratch the surface of these materials.
Step 1: Mix baking soda with warm water. Prepare a dilute solution. (Alternatively, you can use a commercial washbasin spray and spray it as per the manufacturer’s directions.)
Step 2: Apply this mixture gently on the sink with a non-abrasive applicator. A soft cloth, sponge, or brush made of polyethylene, nylon, or polyester can be used.
Step 3: Apply a thicker paste of this mixture on stubborn areas. Alternatively, you can make a paste by mixing vinegar and baking soda. You can apply this thick paste on stubborn areas.
Step 4: Wet the surface of the sink and gently rub it with a soft cloth, sponge, or soft nylon brush.
Step 5: Rinse the cleaned sink surface thoroughly. Ensure no cleaning residue remains.
3. Natural Stone Bathroom Sinks
Natural stone sinks are made of marble, granite, or slate. These sinks radiate beauty and luxury. As already mentioned, their resistance to cleaning products is limited.
While these artfully shaped sinks are elegant, deep cleaning them can be time-consuming because they’re usually carved from a single block of stone. Use a sink cleaner that does not contain harsh chemicals or scouring agents.
Step 1: Pour a few drops of a concentrated cleaner on a soft towel or sponge.
Step 2: Rub the cleaner over the surface of the sink using small circular motions. Clean the outer surface first. Begin at the top and move towards the bottom. Repeat this process on the inner surface as well. Ensure that the overlapping circles cover the entire surface of the sink.
Step 3: Rinse the sink surface completely with clean water. Repeat the previous step to ensure no trace of stains remains on the sink.
Step 4: Use a soft cloth to dry the surface of the sink after you finish.
4. How to Clean a Bathroom Sink Drain?
Cleaning the bathroom sink drain is a key part of deep cleaning your sink. Here's a simple method to keep your drain clear and free of clogs.
Step 1: Start by removing the drain cover and use a drain snake or a wire hanger to pull out any visible debris.
Step 2: Next, pour a mix of baking soda and vinegar down the drain. This combination helps break down organic matter and clear clogs.
Step 3: Let the mixture sit for 15-30 minutes. You'll notice bubbling as the mixture works to break down the debris.
Step 4: Flush the drain with boiling water to clear out the remaining residue.
Step 5: Finally, replace the drain cover and run hot water for a few minutes to make sure everything is clear.
If your bathroom sink is blocked, check out our detailed article on How to Unblock a Bathroom Sink.
How to Deep Clean Bathroom Taps?
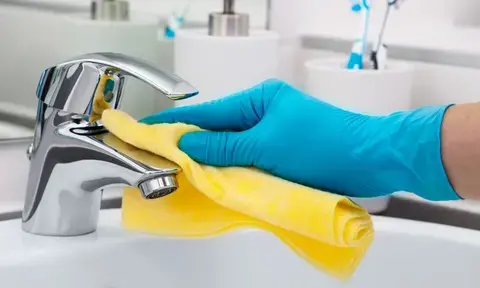
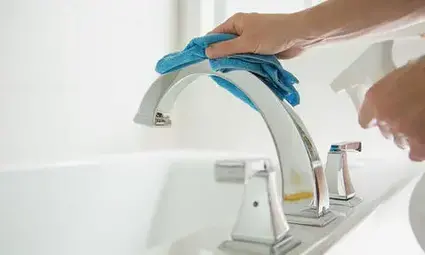
Bathroom taps get dirty due to dirt, grime, hard water stains, and limescale deposits. Deep cleaning the taps is indispensable, as it will enhance the overall aesthetics of your bathroom.
Bathroom taps are made of different materials, such as stainless steel, brass, zinc, and zinc alloys. Depending on the tap material, you can use any of the following ingredients for deep cleaning:
- Lime or white vinegar
- Salt
- Baking soda
- Dishwashing liquid
Also, keep these essential cleaning tools at hand:
- A microfiber cloth
- Plastic jar
- A spray bottle
- Scrubber
- An old toothbrush
- A dishwashing sponge
1. Deep Cleaning Bathroom Taps Using Lime or White Vinegar
A mixture of water and lemon juice or water and white vinegar is highly effective in removing stubborn stains or limescale deposits.
Step 1: Squeeze pieces of lemon and collect the lime juice in a plastic jar. Mix an equal quantity of water and pour this mixture into a spray bottle and close it. Shake the bottle. (If you do not have lime juice, use vinegar.)
Step 2: Spray evenly on the surface of the bathroom taps.
Step 3: Let it rest for 45 minutes to an hour. The acidity of these ingredients will act upon stubborn stains or limescale deposits.
Step 4: Wipe the taps thoroughly with a microfiber cloth.
2. Deep Cleaning Bathroom Taps Using Salt
Salt is extremely effective in eliminating germs and removing hard water deposits.
Step 1: Pour salt uniformly over your bathroom taps, tapping some extra quantity over the affected areas.
Step 2: Let it remain for two or three hours. The salt will destroy the germs and break down hard water deposits.
Step 3: Scrub the taps gently using a scrubber.
Step 4: Rinse the taps thoroughly with lukewarm water until they are shiny.
3. Deep Cleaning Bathroom Taps Using Baking Soda
Baking soda is incredibly effective in removing grime deposits on bathroom taps.
Step 1: Mix 1–2 tablespoons of baking soda with 100 ml of water.
Step 2: Apply this paste uniformly over the bathroom taps.
Step 3: Let this paste stand for a few hours and act on the stained surface.
Step 4: Clean the hard-to-reach spots by scrubbing with an old toothbrush.
Step 5: Wash the taps with plain water until the stains disappear.
4. Deep Cleaning Bathroom Taps Using Dishwashing Liquid
Dishwashing liquid is immensely effective in removing stubborn stains on bathroom taps.
Step 1: Mix 10–15 drops of dishwashing liquid in a plastic jar containing lukewarm water.
Step 2: Soak a dishwashing sponge in this jar, and scrub the taps with this sponge.
Step 3: Scrub the corners and hard-to-reach spots with an old toothbrush.
Step 4: Rinse the taps thoroughly with plain water and wipe dry with a clean towel.
How to Deep Clean Shower Enclosure Including the Shower Tiles/Tray?

Getting your shower enclosure to look spick and span is vital. Only then your shower will be a pleasant place in which you can look forward to enjoy spending your downtime. But soap scum can build up quickly in every area of your shower enclosure – shower door, chrome fixtures, shower head, shower tiles, shower tray and shower drain.
Let’s look at the best way to deep clean each one of these shower enclosure accessories.
Note: Before you begin deep cleaning the accessories in the shower enclosure, remove toiletries, toys, shower mat and anything that’s not fixed. Open the bathroom windows, switch on the extractor fan and leave the door open.
1. Shower Door
Note: Avoid using scouring pads or abrasive cleaners on glass shower doors as these products can cause permanent scratches on the glass surface.
Step 1: Heat half a cup of undiluted vinegar for 30 seconds in a microwave. Fill a small spray bottle with this warm vinegar. (Alternatively, you can use a commercial shower glass cleaner.)
Step 2: Mist the outer side of the shower door. Allow the sprayed vinegar to stand for 5 minutes.
Step 3: Wear rubber gloves and scrub the sprayed area with a sponge or soft plastic bristle brush.
Step 4: Rinse the cleaned area with water. Repeat the previous two steps to achieve a truly deep clean.
Step 5: Mist the inner side of the shower door and repeat the previous three steps.
2. Chrome Fixtures
Step 1: In a spray bottle, mix equal parts of water and vinegar and shake well.
Step 2: Spray onto the surface of the chrome fixtures in your shower enclosure. (Alternatively, you can use a chrome cleaner.)
Step 3: Scrub carefully with a non-abrasive sponge.
Step 4: Use a microfiber towel to wipe the chrome fixture clean.
3. Shower Head
The shower head can quickly accumulate lots of stubborn grime. Vinegar is the best cleaning solution for chrome as well as brass shower heads.
Step 1: Take a plastic bag that’s large enough to fit over your shower head. Pour white distilled vinegar into this bag until it’s half full.
Step 2: Place this half-filled bag over the shower head and ensure it is fully submerged in vinegar.
Step 3: Use an elastic band to hold the bag securely in place.
Step 4: Allow the shower head to soak well in the vinegar for several hours or even overnight. (If you have a brass shower head, don’t let it soak for more than 30 minutes.)
Step 5: Remove the bag and dispose of the vinegar safely. Turn the water on for a few minutes to flush out the mineral deposits inside the shower head.
Step 6: If the build-up is intense, use an old toothbrush to scrub the shower head, focusing on the base. Turn the water on once again to flush out any residue. Rinse and repeat if needed.
Step 7: Use a microfiber cloth to polish the shower head gently.
4. Shower Tiles
Not all bathroom shower tiles need the same treatment. As in cleaning floor tiles, you should be alert to making an inadvertent mistake because you can easily cause more damage than good.
We have already examined how to deep clean different types of bathroom floor tiles above. Use the instructions detailed above for deep cleaning the type of shower tiles that matches the floor tiles, as explained.
5. Shower Tray
Since the shower tray is warm and cosy, it’s the perfect host for bacterial growth. Any bathroom cleaner spray is effective in cutting through the grease and grime on the shower tray.
But don’t use anything too abrasive as this could damage the surface.
Step 1: Spray the bathroom cleaner on the shower tray. Wait for a few minutes. (Alternatively, you can mix white vinegar with baking soda and apply the mixture on the shower tray. However, you’ll need to allow this liquid to sit for two or three hours.)
Step 2: Use a soft, damp mop to clean thoroughly.
Step 3: Rinse the cleaner down the drain with warm water.
Step 4: Remove any remaining dirt deposits by scrubbing with a sponge. Rinse once more with warm water.
6. Shower Drain
Deep cleaning the shower drain is a tough task. But if you don’t do this once a month, it can result in your drain getting clogged and the water in the shower enclosure not draining properly.
While a chemical drain cleaner is effective and easy to use, the harsh chemicals can damage your pipes.
Step 1: Remove the shower drain cap. Physical blocks like hair need to be removed first. Use a drain snake for this. Alternatively, you could use a thin wire coat hanger.
Step 2: Wear rubber gloves and remove the initial debris with your fingers. Next, insert the movable end of the drain snake down the drain. As the snake winds down the drain, use a slight twisting motion to move the end forward.
Step 3: Tug upwards slowly. Pull the blocking debris out, and put everything you pull out into a plastic bag.
Step 4: Repeat this process until you’ve cleared all the blockages.
Step 5: This is an extra step. Use baking soda and vinegar to clear any remaining dirt or debris. Pour some baking soda down the shower drain. Follow this by pouring distilled white vinegar. You hear a fizzing sound as the remaining grime and blockages are cleared.
Step 6: Wait for about 30 minutes. Pour half a bucket of hot water to flush the mixture down the drain.
How to Deep Clean a Bathroom Mirror?
A sparkling mirror can make your bathroom look brighter and more inviting. Here’s how to deep clean your bathroom mirror:
Step 1: Start by spraying a good amount of glass cleaner or a mix of equal parts water and vinegar onto the mirror.
Step 2: Use a microfiber cloth to wipe the mirror in a circular motion. Pay special attention to any spots or streaks.
Step 3: For stubborn spots, apply a small amount of rubbing alcohol to a cotton pad and gently rub the area.
Step 4: Wipe the entire mirror again with a clean, dry microfiber cloth to remove any leftover cleaner and to polish it up nicely.
Step 5: If the edges of the mirror have built-up grime, use a cotton swab dipped in the glass cleaner to clean the edges.
How to Deep Clean a Bathroom Radiator?
Bathroom radiators can collect dust and grime, which can affect their efficiency. Here’s how to deep clean your bathroom radiator:
Step 1: First, turn off the radiator and let it cool down completely.
Step 2: Use a vacuum cleaner with a brush attachment to remove dust and debris from the surface and between the fins of the radiator.
Step 3: Wipe down the radiator with a damp cloth to get rid of any remaining dust.
Step 4: For stubborn grime, mix some warm water and a bit of mild detergent. Use a sponge or cloth to scrub the radiator gently.
Step 5: Rinse the radiator with a clean, damp cloth to remove any soap residue.
Step 6: Finally, dry the radiator thoroughly with a clean towel.
How to Deep Clean a Bathroom Exhaust Fan?
Cleaning the bathroom exhaust fan is essential to maintain proper ventilation and prevent mould growth. Here's how to do it:
Step 1: Turn off the power to the fan at the circuit breaker.
Step 2: Remove the cover of the exhaust fan. Most covers can be easily removed by pulling them down and squeezing the metal clips.
Step 3: Use a vacuum cleaner with a brush attachment to remove dust and debris from the fan blades and the motor.
Step 4: Wipe down the fan blades and cover with a damp cloth.
Step 5: If the fan is particularly dirty, you can wash the cover in warm, soapy water. Rinse and dry it thoroughly before reattaching it.
Step 6: Reattach the cover and turn the power back on.
How Much Does it Cost to Deep Clean a Bathroom?

Deep cleaning a bathroom is difficult and time-consuming. The cost of house cleaning services varies quite a lot in the UK, depending on the location of your house.
Many cleaning agencies specialise in deep cleaning your bathroom. The price for deep cleaning a bathroom depends on the size, the number of accessories, and the condition of the bathroom.
Other related articles that you might also be interested to read: